Hair oils are fantastic multitaskers. Not only is hair oil a lubricant making it easier to detangle wet hair, but they're also a natural heat protectant, fight hair fall, tame frizz, and can combat dry scalp and dandruff.
I've used hair oil off and on for the past decade, but have been using it consistently for the last year after every wash. My main purpose for use is moisturization. I've tried many brands at many different price points over the years and have two, one splurge and one one, that I love!
The Splurge: Olaplex No. 7 Bonding Oil $28 for 1oz
I love this one because it's formulated without sulfates, parabens, and formaldehydes. Along with hydrating my hair I find it leaves it shiny and smooth. This oil offers heat protection up to 450 degrees (F) which is perfect because I often use a blow dryer and straightener. My favorite thing about this product is the way it's dispensed. You turn the bottle upside down and gently tap the bottom with your index finger which releases a metered drop. It's pH balanced and I love using it along with my other Olaplex products.
The Save: Hask Argan Oil Repairing Shine Hair Oil $6.99 for 3.3oz
This oil is also free of sulfates, parabens, and formaldehydates and is gluten and alcohol free. I pump out and apply a quarter sized amount after washing my hair. It doesn't weight my hair down and it has a nice, light citrus scent!
Hair oils can be made out of argan oil, coconut oil, macadamia oil, almond oil, and many, many others! It takes a little trial and error to find the best one for you!
Showing posts with label hair. Show all posts
What's Hap'pin'ing in Quarantine?
Monday, April 20, 2020
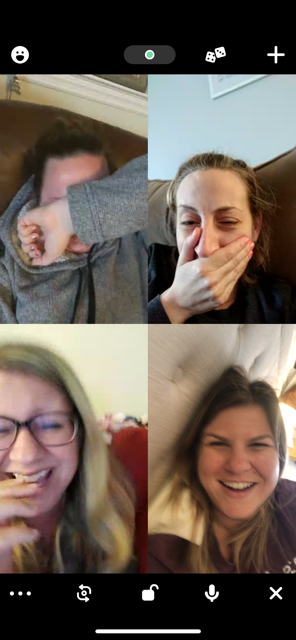
How is everyone doing in week... 5? 6? of quarantine? I've been staying sane with video chats with friends/coworkers and my sister, brother's wife, and cousin. My sister-in-law and I video chatted/watched that new Bachelor franchise show Listen to Your Heart together. Those shows are always more fun to watch with someone else. I'm looking forward to a virtual meeting with my book club tonight! Along with working on the blog I've been hitting up Pinterest!
Since I've been watching The Great British Baking show I've been itching to make some stuff at home! However, it's really hard to get yeast, sugar, flour, and butter right now. Is anyone else having the same problem? When I do get my hands on some baking supplies I really want to make this cherry almond cake, cheddar zucchini bread, copycat Outback Steakhouse bread (honey wheat bushman bread), and Buckeye fudge.
This quarantine can be a bit stressful with not being able to see loved ones or not working. I'm thinking about trying a green tea detox bath!
Crafting can keep you going! I've been knitting (I'm at a very basic level) and I like crafting, but I'm not great at it. So I went to Pinterest to find some easy crafts that I can't screw up too badly!
![]() |
| tutorial here |
![]() |
| tutorial here learn how to make your own stencils without a cutting machine here |
What's been hap'pin'ing with you during quarantine?
Easy Hairstyles for Hot Temps
Monday, June 11, 2018
// THE BUBBLE PONYTAIL //
The bubble ponytail is the perfect way to update a classic for summer. All you need for this look is clear hair elastics.
Start by securing your hair in a ponytail with an elastic. Tug on the top section to created more volume and a relaxed look. Skin this step if you want a slicked back, polished look. Take a small section of hair from the ponytail and loosely wrap it around the clear elastic until you get to the end of your hair. Find the elastic under the hair where it isn't visible and pull the end of the wrapped strand of hair through that elastic so it stays in place. Tease a one to one and half inch section of the ponytail started at the top of the ponytail. Separate the teased hair from the other portion of the ponytail with another hair elastic. Repeat until you get to the end of the ponytail. Try to create the bubbles to be the same size both vertically and horizontally. When finished, tug at the bubbles to loosen them up and make the look more deconstructed.
// THE MESSY TOP KNOT //
The top knot is my favorite hairstyle at any time of year, but especially in the summer since it's keeps my hair off of my neck and out of my face! A messy top not is super simple for summer. You'll need your favorite texturizing product (I love sugar sprays), one hair elastic, bobby pins, and curling iron if you want/need to create a fuller look.
Start by lightly spritzing your hair with a texturizing product. Next, if you're curling, this is when you want to do it. Then pull your hair into a loose high ponytail and secure it with a hair elastic. Next, separate the ponytail in to two sections. Start with one section and light twist it. Hold the twisted section up vertically. Grab the hair by one strand and gently push the rest of the twisted section down towards the base of the ponytail. Then wrap this section of hair around the base of the ponytail securing it with bobby pins. Repeat on the second section, smooth any fly-aways with the curling iron, and presto... the prefect messy top knot!
// THE TWISTED BANG //
Begin by taking a one inch section of hair near your part and at the front of the hairline. Start to twist away from your face. Continue to grab more hair from the hairline and continue to twist. Continue until your twisted piece is the desired length. Secure the twist with a bobby pin.
HAPPY SUMMER!
Winter Hair, Don't Care
Wednesday, December 6, 2017
Winter brings all sorts of challenges for you hair. Dry air, wild winds, and going from the cold air outside to the heat inside can really do a number. And let's not forget that static cling! Following some simple steps will have your hair looking great all winter long, and you'll be saying 'Winter hair? Don't care!'
DETANGLE PRE-SHOWER
I've always had the worst tangles. If I wear my hair down I have to make sure I have a brush on hand to give it a good run-through a few times per day. Getting a brush through my hair after the shower when it's wet? Forget it. I've sent more than a few brushes and combs to the graveyard after breaking them trying to get them through my hair. Trying to brush out snarls and snags in wet hair is causing damage to the cuticle. Brush your hair prior to washing if you have tangles. It also makes for easier brushing after the shower!
TURN DOWN THE TEMP
I love hot baths and showers during the winter, but the hot water is actually striping my hair and scalp. Warm water is best to help your open up the hair cuticles, letting shampoo and conditioner penetrate better. A five second cold water rinse is recommended at the end of your shower to help seal the cuticles and boost shine.
CONDITION CORRECTLY
A nickle sized amount of conditioner is a perfect amount for most hair types and lengths. For my fine hair, I only apply conditioner to the ends. This is also best for short hair. If your hair is thick, apply from ear level down. Leave conditioner on for one minute and then rinse out.
RINSE THOROUGHLY
Spend at least one minute under the shower head to properly rinse shampoo and conditioner out of your hair. Running your fingers through your hair lets the water get to every layer. Left over product can cause build up that dulls shine. Make sure the water runs clear before you stop rinsing.
WASH EVERYDAY
There is no harm in washing your hair everyday... unless you have oily hair. Shampooing oily hair every day can strip your scalp and make it dry, causing your glands to produce even more oil to compensate. If you don't fall into the oily hair category, shampooing your hair everyday won't dry it out if you are using the right shampoo. There are a lot of products out there, so if you're unsure what to use go with a sulfate-free shampoo. It's gentle on all hair types.
DEEP CLEAN ONCE A WEEK
Deep clean DIY! Mix a teaspoon of granulated sugar into your squeeze of shampoo and rub it into your scalp. The sugar gently exfoliates the scalp getting rid of dirt and product residue. Rinse as instructed above. A clarifying shampoo can be used one a month if you tend use use a lot of styling products. A healthy scalp is the base to great hair!
DETANGLE PRE-SHOWER
I've always had the worst tangles. If I wear my hair down I have to make sure I have a brush on hand to give it a good run-through a few times per day. Getting a brush through my hair after the shower when it's wet? Forget it. I've sent more than a few brushes and combs to the graveyard after breaking them trying to get them through my hair. Trying to brush out snarls and snags in wet hair is causing damage to the cuticle. Brush your hair prior to washing if you have tangles. It also makes for easier brushing after the shower!
TURN DOWN THE TEMP
I love hot baths and showers during the winter, but the hot water is actually striping my hair and scalp. Warm water is best to help your open up the hair cuticles, letting shampoo and conditioner penetrate better. A five second cold water rinse is recommended at the end of your shower to help seal the cuticles and boost shine.
CONDITION CORRECTLY
A nickle sized amount of conditioner is a perfect amount for most hair types and lengths. For my fine hair, I only apply conditioner to the ends. This is also best for short hair. If your hair is thick, apply from ear level down. Leave conditioner on for one minute and then rinse out.
RINSE THOROUGHLY
Spend at least one minute under the shower head to properly rinse shampoo and conditioner out of your hair. Running your fingers through your hair lets the water get to every layer. Left over product can cause build up that dulls shine. Make sure the water runs clear before you stop rinsing.
WASH EVERYDAY
There is no harm in washing your hair everyday... unless you have oily hair. Shampooing oily hair every day can strip your scalp and make it dry, causing your glands to produce even more oil to compensate. If you don't fall into the oily hair category, shampooing your hair everyday won't dry it out if you are using the right shampoo. There are a lot of products out there, so if you're unsure what to use go with a sulfate-free shampoo. It's gentle on all hair types.
DEEP CLEAN ONCE A WEEK
Deep clean DIY! Mix a teaspoon of granulated sugar into your squeeze of shampoo and rub it into your scalp. The sugar gently exfoliates the scalp getting rid of dirt and product residue. Rinse as instructed above. A clarifying shampoo can be used one a month if you tend use use a lot of styling products. A healthy scalp is the base to great hair!
For prefect Winter skin check out Three Secrets to Incredible Skin!
Five on Friday 1.27.16
Friday, January 27, 2017
//1// Women's March on Washington
All of the women's marches around the country last Saturday were epic. I'm kicking myself for not being a part of one. I think it's important to stand up for what you believe in and make your voice heard. I had personal friends who marched, and was excited to see how many blog ladies made it to their local events. Never back down from what you believe in.
I really want to highlight Lindsay from Bourbon, Lipstick, and Stilettos. She has been one of my favorite bloggers for awhile now and her posts were just out of this world this week. Seriously, this girl is awesome.
//2// This T-Shirt
I'm obsessed with cute puppies!!! My little Scout is 7 and still looks like a puppy. My husband Nick tells me if he weren't around I'd be a puppy hoarder. They're all just sooooo cute!
//3// Hair Inspiration
It's time to go back to my roots. I have been fake blonde long enough and want something more manageable and more natural looking. Loving some looks I found on Pinterest.
What you all think? I need opinions!
//4// Gwyneth Paltrow's Pantry
Come on. Can her organizer come over to my house, like, pronto?
//5// Truth
Happy Friday.
Beauty Business Spotlight: Maple Holistics
Monday, October 3, 2016
Maple Holistics is a US based beauty company that has been working in natural and organize product industries for the past few years. The company develops and manufactures all natural cosmetics which are animal cruelty free.
Maple Holistics specializes in bath and body, hair care, and skin care, so when they asked me if I wanted to try to product to review I jumped on it quickly! I was a sent a bottle of the Silk 18 conditioner to try for an honest review in return.
Years of research were dedicated to formulating a blend of conditioning agents which can maximize the smoothness of hair. Silk 18 does not have an potentially harmful additive, and is effective on all hair types. This product boasts 18 silk amino acids, shea butter, aloe vera, green tea, pomegranate, hibiscus, sea buckthorn, argon and jojoba oil, botanical keratin, and vanilla.
With all these ingredients I thought my hair was going to be really weighed down by this conditioner. To give it a fair chance, I used this conditioner after shampooing, a did not apply my usual styling products after.
This conditioner has the same weight as any other conditioner and smooths on like any other conditioner. I have hair that tangles easily and I found I was able to get my fingers through my hair a little bit easier than with other conditioners. The mild scent of vanilla (real vanilla!) was delicious, relaxing, and refreshing! I usually do a leave in conditioner or detangler in order to brush my hair through after washing, but I was happy to find that I could actually get a brush through my hair without any of these products! Silk 18 left my hair incredibly manageable, smooth, and silky.
I'm looking forward to purchasing a shampoo and bubble bath! The Lavender and Eucalyptus bubble baths remind me of my DIY Stress Away Bath Soak. Make sure to check out this link for free products and check out this article on purple shampoo!
What's Hap'pinning' Wednesday: Updos
Wednesday, August 12, 2015
I had so much joining Jessi and Jenn's link up last Wednesday that I needed to do it again this week!
Last week was all about home organization and this week is all about hair!
I'm very hands on in my role as a medical assistant. I'm rooming patients and helping doctors with procedures all day a long. It even states in my company's dress code that hair longer than shoulder length needs to be tied back. It's easy to get up in the morning and just pull everything back into a ponytail, but I'm still a girl and still want to be cute. Pinterest is the best place to find cute and functional up-dos for work.
Last week was all about home organization and this week is all about hair!
I'm very hands on in my role as a medical assistant. I'm rooming patients and helping doctors with procedures all day a long. It even states in my company's dress code that hair longer than shoulder length needs to be tied back. It's easy to get up in the morning and just pull everything back into a ponytail, but I'm still a girl and still want to be cute. Pinterest is the best place to find cute and functional up-dos for work.
What are your favorite ways to keep you hair out of your face?
Don't forget to enter for a chance to win an "I Love Shoes" notebook
and nail polish by Sinful Colors in Amethyst.
Come back on Friday for another Detox Water recipe!
Beauty A-Z: D - Dye-it-Yourself Hair Color
Thursday, January 29, 2015
We are now on week four of the Beauty A-Z link-up! The premise is simple: every Thursday, we share
our favorite brands, tips, tricks, or tools that correspond with that week's
letter. We'll make our way through the alphabet the next 26 weeks. Link up your "D" post below and make some new friends, learn some new tricks, and
discover new brands!
As many of you may have read last week, I am now a full time student. We've had to cut back on costs in our household. One of the ways I was able to cut back was to learn to dye my own hair. This tutorial may seem intimidating, but it's a fairly simple process once you know all the tips and tricks!
Before You Dye
//1// That hair color you see on the model outside the dye box? That might not be the color result you get when you dye your hair. The resulting hue is highly dependent on your current color. Someone who has dark hair will not get the same results as another with blond hair when they use the same box of “honey brown.” Many of the boxes have color charts showing the likely outcome for each starting color, so make sure you check those. Because not every photo or chart on the dye box is accurate, it also helps to look at the color code label. The numbers, or “levels,” indicate lightness - 1 being black and 10 light blond. The letters indicate tone - for example, A for ash and C for copper.
//2// Choose a shade either only 2 shades lighter or two shades darker. Leave anything beyond this to the professionals. Use these websites to help you choose a shade: Garnier Nutrisse Shade Selector; Loreal Paris Hair Color Consultation
//3// Think about hair length, thickness, amount, and condition. The goal is to minimize damage while achieving optimum color. This means if you have lots of hair or very long hair, you might need two boxes of dye to get the best and most even coloring. This also means you might want to leave the dye in your hair for an extra 5 to 20 minutes if you have very thick or coarse hair.
//4// Hair dye contains some harsh chemicals, so it’s better to be safe than sorry. If you have never used hair dye before, read the directions and do a skin test. Many brands will have instructions on a 24hr or 48hr skin test where you dab some of the dye on your skin to see if you show any signs of irritation.
//5// Do strand test. This is when you apply your hair dye to only a few strands of your hair. It will help you determine whether or not your like the color, and how long you will need to leave it on.
//6// Leave your hair unwashed for 24 to 48 hours prior to applying dye. Shampoos and conditioners can eliminate your natural oils, which are needed to help the dye set it.
//7// Before you begin, make sure you have everything you need in front of you, because you don’t want to stop in the middle of squeezing dye into your hair and have to run to another room to fetch something. This can get messy. Be prepared with paper towels and a comb if you like to use one, and a hand held mirror in case you have difficulty seeing the back of your hair.
//8// Put a thin layer of petroleum jelly on the outermost edge of your hairline. The jelly will provide a barrier so the dye does not stain the skin.
//9// Separate your hair into four different sections using the clips. Doing this will ensure that you don't miss a patch.
Apply to Dye
//1// Open your dye box, put on your gloves, and read the directions carefully. Mix your dye according to the instructions from the box.
//3// The front and sides will dye faster than any other part. This is because of the warmer temperature around that area. Start with the midsection of your hair, move to the back, and then finish with the front and the sides. This is a great way to even out the color.
After You Dye
//1// Set a timer for the amount of time that is found in the instructions. Follow this direction exactly unless...
//2// Hair will dye faster in warm temperatures because heat speeds up the chemical reaction of the dye. This may mean you might want to leave it in an extra 10 minutes in the winter, or use a shower cap to keep the heat in.
//3// You can use wet paper towels to wipe any dye that may have dripped onto your ears and face. Hair dye will dye your skin too, and it could take days to wash off completely.
//4// Wait until the processing time is over. Jump in the shower or use the sink or tub to to rinse your hair. Rinse completely until the water runs clear.
//5// Condition for a full five minutes with the provided conditioner. Rinse once five minutes has passed.
//6// Do not wash your hair with shampoo. It is best to leave your dyed hair unwashed for 24 to 48 hours. Waiting to wash allows the dye to more thoroughly penetrate your hair shaft.
//7// Avoid exposing your newly dyed hair to extended time in the sun for at least a day. UV rays can interfere with freshly applied hair dye.
Subscribe to:
Posts (Atom)